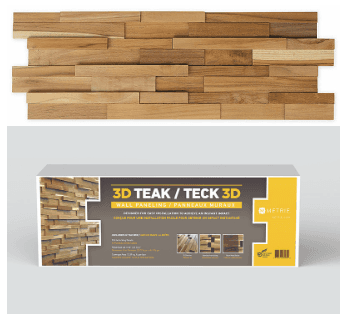
3D Teak Panel Accent Wall
September 12, 2022
By: The Finished Space
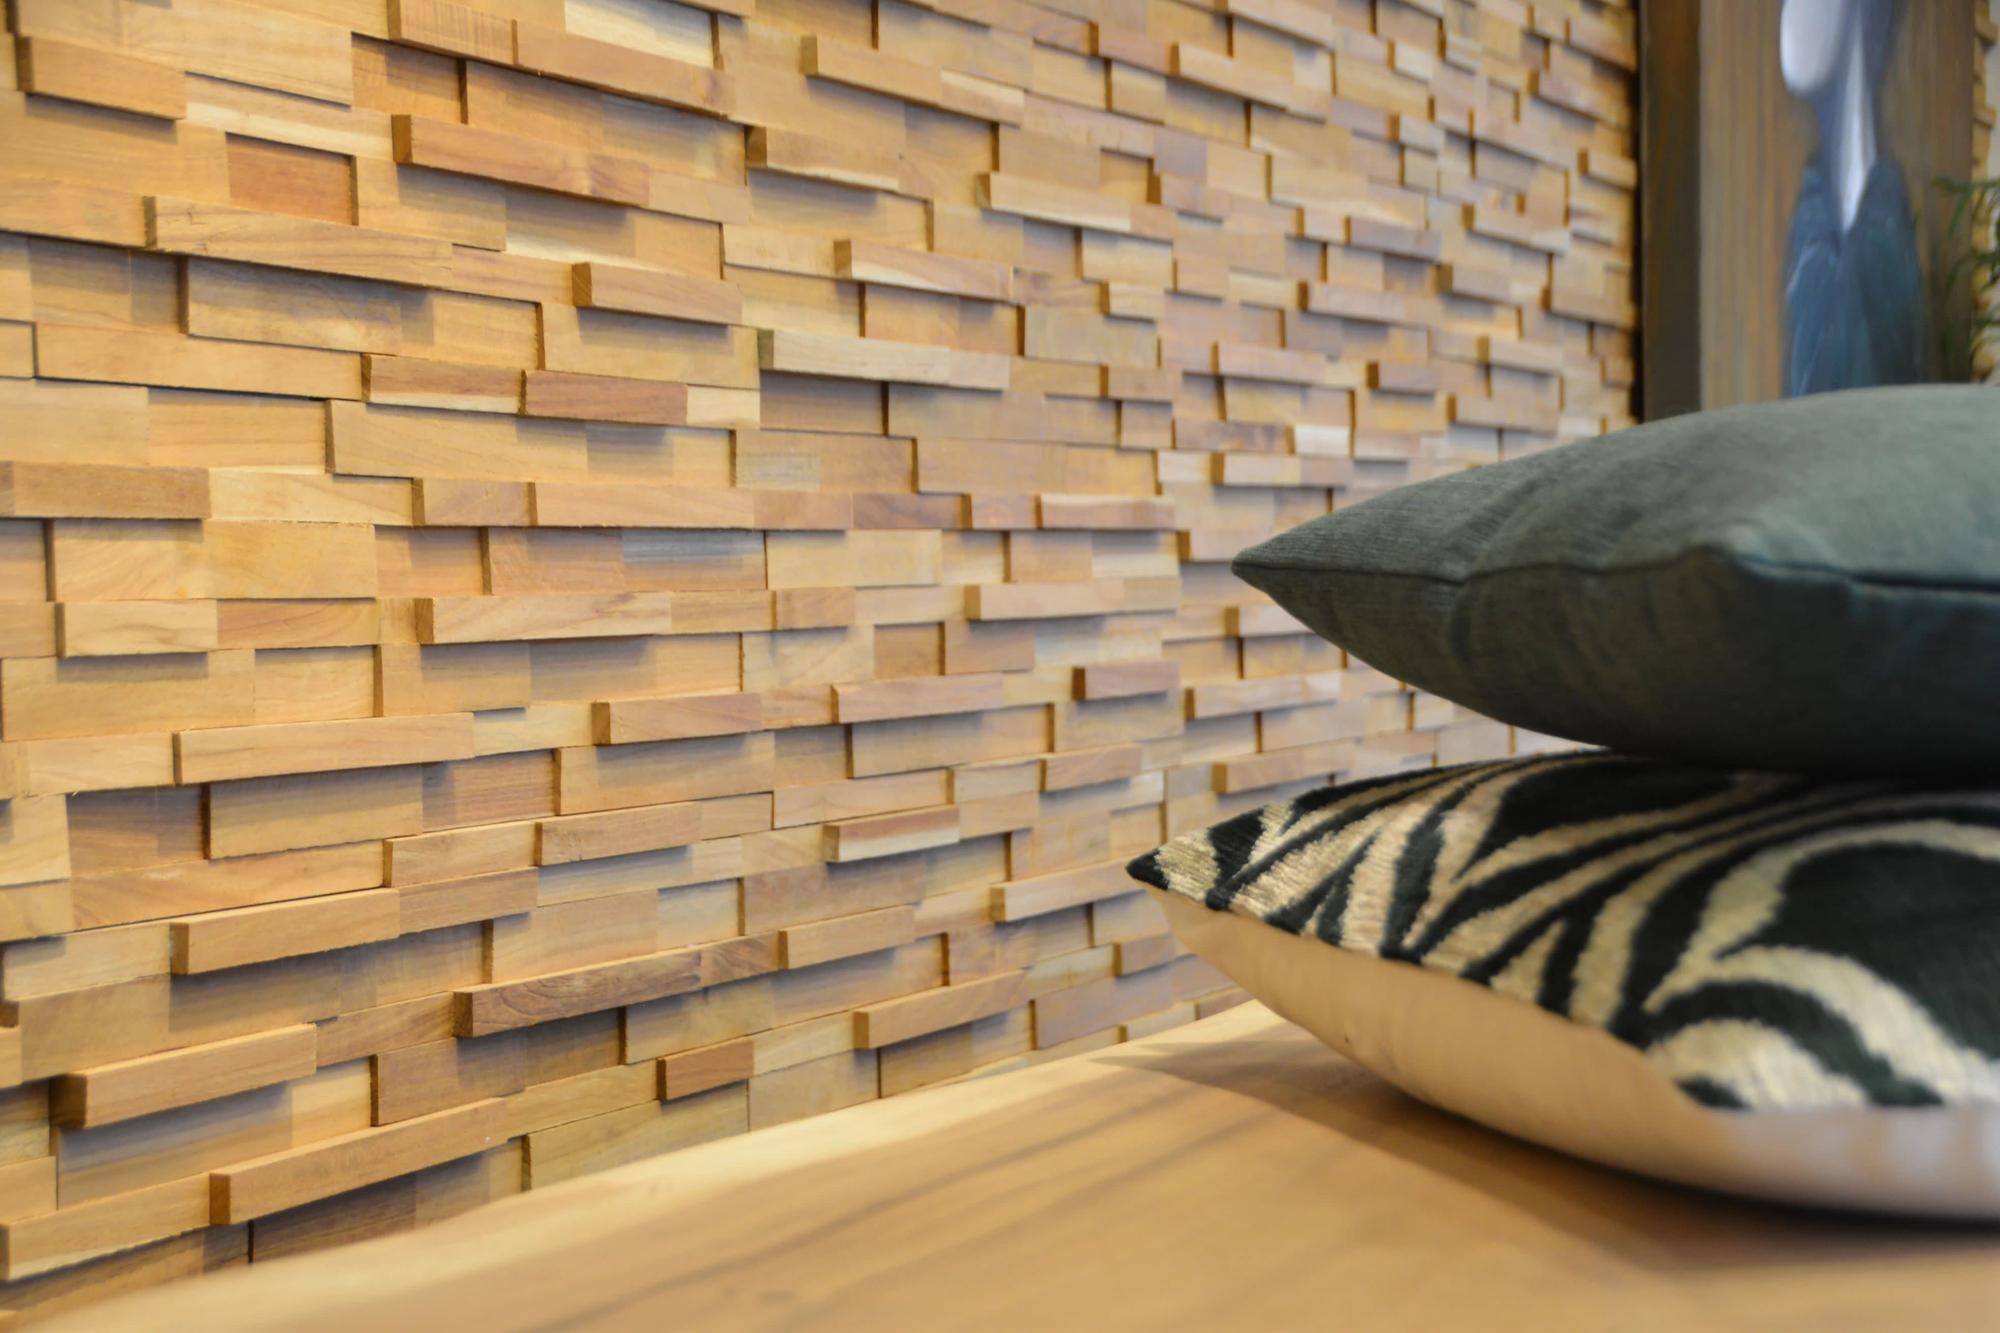
3D Teak Wall Paneling is a unique, on-trend solution that helps bring natural wood elements indoors. These textured panels can enhance any home or space — from rustic to contemporary.
Key Features
Our 3D Teak Panels are made with repurposed, high quality, solid Teak Wood.
It comes pre-assembled in sheets, like backsplash wall tiles, that interlock, with a mesh backing holding everything together, they are quick and easy to install. They provide a one-of-a-kind look and are ideal for accent walls, above fireplaces or anywhere you want to add interest!
How To Install
Install Video: Metrie® 3D Teak Wall Paneling - YouTube
The easy to install panels are ideal for DIYers or renovation contractors alike!
Ensure the surface you are installing to is clean, and is not regularly exposed to water, moisture, or excessive heat.
Tools for Install
Saw with fine cut carbide blade (62 or better)
Wood Adhesive or Glue
Finishing Nails
Painters Tape
Chalk Line
Protective Equipment
Measuring Tape
Utility Knife
Installation
It is recommended to start from the bottom left corner and place chalk line for guidance.
For horizontal orientation, place the first plank at the bottom left corner; for our 3D interlocking wood panels start by cutting the left interlocking piece, and work by row to the right, for the next row you may start with the bottom row off-cut for variation.
For Vertical orientation start from the bottom left; for our 3D interlocking wood panels start by cutting the left interlocking piece, and place the next panel above the first panel, for the next column you may start with the off-cut of the first column for variation.
Steps to Install – Glue Method
1. Insert the tube in the caulking gun, then cut the tip of the tube at an angle with scissors or a sharp utility knife. Use the impressed guide on the tube’s tip to create a hole that will allow a 6.35 mm (1/4") bead of glue. A ready-to-use, squeeze tube has the same guide and is cut the same way.
2. Spread the adhesive across the back of the panel by squeezing the trigger on the gun. Create a long bead in a zigzag pattern so there is even coverage. The rows of adhesive should be about 20.32 - 30.48 cm (8-12") apart and about 25.4 mm (1") from the edge of the panel. Alternately, spread the glue on the wall using the same technique and spacing.
3. Allow the glue to partially cure by waiting the short amount of time specified on the product label. This is usually only a few minutes. If you are using a glue that doesn’t require a waiting period, move on to the next step.
4. Place the panel against the wall and use your hand to push the panel so the glue spreads and the panel adheres. A roller made specially for this job is available at local hardware stores and home centers.
5. Secure the panel in place with finish nails or brads. Do this when the panel won’t be held in place by trim pieces or when using thicker, heavier panels that won’t stay on the wall with adhesive alone
Where to Buy
Metrie 3D Teak is available now on Lowes.ca and Rona.ca and at our local dealers. Where to Buy Trim & Moulding Near You | Metrie